

When we bought our house I was so excited to finally have a garden. Growing up we had a small front garden that we never used and a back garden that was just a concrete slab. So, when we looked for a house a decent sized garden was a must. I’ll be honest, we didn’t look at the garden as well as we probably should have. It turned out to be a complete mess with everything planted too shallow and it was really overgrown. About 5 years ago we did completely overhaul the back garden by having a new fence, decking area and having most of the space that wasn’t the patio covered in new turf. It was backbreaking work and it took 3 skips to clear most of what was there.
Fast forward to 2020 and the garden still isn’t how I wanted it. The grass is all but destroyed and covered in weeds, the decking is rotten and falling to pieces and we’ve had more rubbish to get rid of than I ever could have imagined. At just the right time we got offered a shed from our next door neighbour and we were looking to replace ours soon anyway. This spurred on a bit of a garden makeover. It was nowhere near what I would like to do to it but it’s definitely a big start.

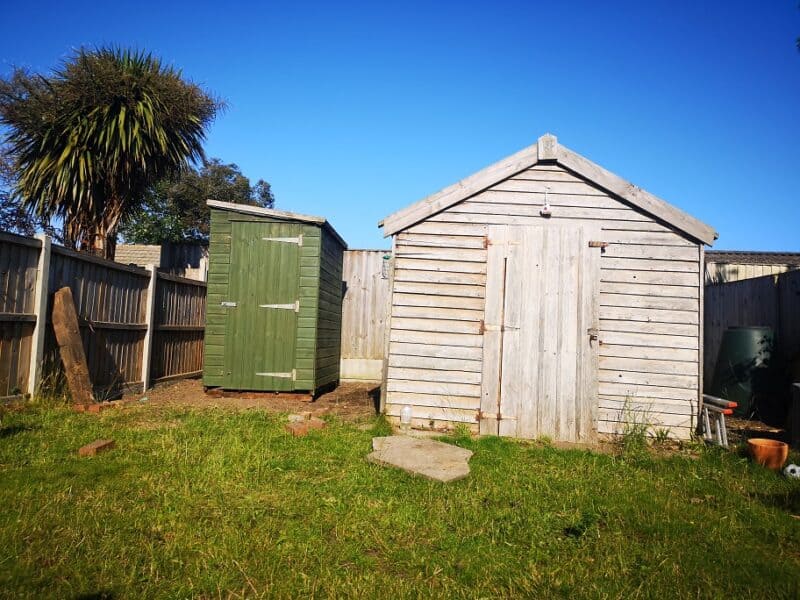
First off, we had to dig over a large area at the back of the garden. This is where the old shed was and it was huge. We’d not really done anything here since we moved in apart from use it as somewhere to dump junk. Digging over the ground was hard work but at least it was free. I’m a bit impatient so I did it quicker than I probably should have done but we managed to get it done in around a week and then we had to destroy the old shed. Really, this is where it started to cost us money. We don’t drive so we had to pay someone to come and collect the waste for us. We needed 3 trips as well so it wasn’t cheap. The thing here was that once we cleared one lot it meant we had space to do something else, creating more that needed taking away. This cost us £230 in total.
Once the ground was dug over and cleared we could put down weed sheets. We did have some left over from something else but bought a bit more just to make sure we had enough. We’ve not done a good enough job with weed sheets in the past and not secured them properly so this time I invested in some ground pegs to make sure it all stayed down properly, especially around the edges. I’m glad I did this though as there was A LOT of weed sheet and it’s a really large area. The new shed had been painted during this time too (paint free from next door too) and then it just needed to go up. Next door came over and helped out with this though so it only took around 15 minutes.
I think the biggest thing we paid for was something to cover the weed sheets. The whole back area was going to be a play area for Erin so I wanted proper play grade bark rather than the stuff you get for borders etc. This came in at a whopping £235 which was for 40 x 70L bags and it was delivered on a pallet outside of our house. I measured the area and used a checker online to see how much we needed and this should have done it. It has covered the area however, I really want it to be a bit thicker now that it’s been worked in a bit so we might get some more next year so make sure it’s all covered. Although it was a big cost I am really happy with what we chose and it looks lovely.
The problem with the bark was that we didn’t want it spilling over into the rest of the garden. Ideally, I wanted sleepers to make a wall but after shelling out more than I wanted for waste removal, I decided to go with something cheaper for now. For around £33 we got 6 pieces of edging that only needed to be hammered into the ground. This was easier said than done though and it took us a while to really get it in properly. Still, we didn’t do it completely straight and this is something I will change eventually. I’m thinking raised planters with a little gap in the middle for entry.

Mum bought me a bird house for my birthday and since then I have wanted to encourage more wildlife into our garden. We found a great bug hotel in Lidl for around £8 and I found a bird’s nesting box in a local shop for only £5. We added these to a quiet corner at the back of the shed with the hopes that the cats didn’t disturb anything too much. These were only small things but it really added something extra to the area where the bird table is.
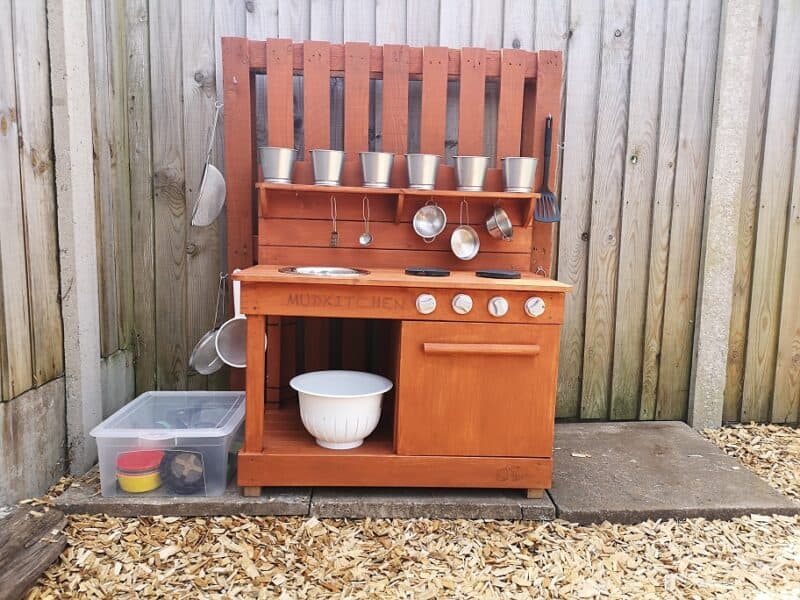
With the back of the garden now being for Erin I wanted to spruce up the mud kitchen we bought her for her 4th birthday. I hadn’t done anything with it since we got it and I wanted it to look lovely in the new area. Getting paint wasn’t easy as I couldn’t find a colour I wanted and then I had to get a massive tub that cost £11. We also had an old pallet so I decided to paint that too and add it to the back of the mud kitchen for extra storage. I used some really simple hooks and added them to the sides of the mud kitchen so Erin had space to hang extra spoons and spatulas etc. The hooks were about £2 and the spoons I bought at Asda, costing around 50p each along with some other bits and pieces.
The space was looking a bit bare so I also added a picnic table, the kind you see in beer gardens. I didn’t want just a normal wooden table and I knew as soon as I saw a round one that it was the one for us. This cost £140 and without meaning to, I managed to buy one in the same colour nearly as what I’d painted the mud kitchen and pallet.

We were also very lucky to get a couple of big pieces of play equipment sent to us for review so these saved us a lot of money. The Smoby slide is fantastic fun and the Wickey play frame is something Erin has played on every day since we got it. Although these are not actually in the area we’ve done up, they really do make a real difference to the garden and helped to make it somewhere we all want to spend time again.
Cost breakdown:
Waste removal – £230
New shed – free
Weed sheets – £5
Ground pegs – £20
Play grade bark – £235
Border – £33
Table/ chairs – £140
Paint – £11
Hooks for mud kitchen – £2
Pallet – free
Mud kitchen accessories – £5
Bug hotel – £8
Bird house – £5
Smoby slide – gifted for review
Wickey play frame – gifted for review
Total – £694
Obviously, the total cost would have been substantially more had we paid for things like the shed and the play equipment. I’m really pleased with what we did though and how it looks compared to before. This really makes me want to save up for next year to do something else with the garden. Erin has her own area now and I’d love to transform and extend the patio for a more grown up place to spend time.
PIN IT FOR LATER

Fantastic work! We spent a few hundred this year having new grass put down and a fence / gate built but I look at it now and think it was really money well spent!
I’m amazed at what you done. I have watched a lot on insta and looks so good 🙂
oh my goodness ! what a fantastic makeover and budget friendly too!! you have done a trully fantastic job kind regards pati robins at style squeeze blog
It looks really great! I especially love the mud kitchen. Is the bark good to play on then? At the play park it always seems to get spread everywhere.
Oh wow this is fab and so good that you have managed to do this for under £700 pounds too. what a lovely area to chill out in xx
Your garden looks amazing and even better that it was done a such a reasonable cost.